# Smart Object States
Object States are a feature of Captivate that allow a single object to have multiple appearances. For example, a Shape Button's rollover and down appearance are handled by giving it a rollover and down state which can be configured to alter the button's appearance in response to the leaner interacting with the button. Captivate developers would normally use Captivate's default Change State action to change an object's appearance.
CpExtra Smart States can automatically change an object's state in reaction to User Variable values. This makes interaction design in Captivate cleaner because you don't need to employ Advanced Actions to achieve changes of object states.
The following objects support states:
- Shapes
- Captions
- Highlight Boxes
- Images
- SVGs
This video will give you a quick introduction to smart states:
# Creating a New State
- Select the object that you want to have a smart state.
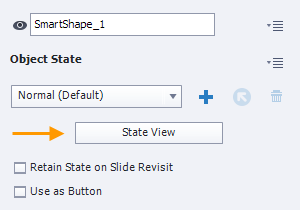
- In the Properties panel, there are two ways to initiate creation of a new state. One way is to click the plus button beside the default state name shown. The other way is to click the State View button to open the Object State panel (usually located in the same area as the FilmStrip or Master Slide panels) and then click the plus button beside New State. Either method allows you to create a new object state.
- Think carefully about the name you enter for the new object state, because this name will be used to tell CpExtra this is a smart state and under what circumstances it should display. (We will discuss these names below)
- After entering the special state name, click OK to save the new object state.
By default, this new state will be selected and any changes made in the Properties panel will be applied to that state.
States can also be re-named using this same dialog box if you need to change an existing state into a smart state, or to alter the name of a smart state (if it proves to be incorrect or conflict with another name).
To do this you need to enter the object's state view by selecting the object and tapping the state view button.
# Defining a Smart State
CpExtra will treat a state as a smart state if the state's name starts with: x_
After x_ we will write the condition under which this state should appear.
# Mouse Smart States
Smart states can automatically appear in response to mouse events.
- A state will appear on rollover if it's named: x_rollover
- A state will appear on mouse down if it's named: x_down
# Variable Smart States
Smart states can change based on on a variable's value.
# When a variable equals a certain value
Name the state according to this formula: x_<variable>_<value>
Let's say you have a variable named color which will sometimes equal red, or green, or blue. You can make a different state appear in response to these three values by naming the state:
- x_color_red
- x_color_green
- x_color_blue
True shorthand
Most often you just want to see if a variable equals true. If you wanted a state to appear when MyVar equals true you could name it:
- x_MyVar_true
However, you could acheive the same behaviour by writing:
- x_MyVar
CpExtra picks this up as shorthand for wanting the variable to equal: true.
CpExtra will also consider 1 to equal true.
Conversely, CpExtra will consider 0 to equal false.
# When a variable DOES NOT equal a certain value
Name the state according to this formula: x_<variable>_not_<value>
Let's say you have a text entry box linked to the Text_Entry_Box_1 variable. You want the learner to write password123 into the text entry box. If they enter anything other than password123, you want to display a state showing a cross. You'd name that state:
- x_Text_Entry_Box_not_password123
# When a variable is greater than or lesser than a number
Name the state according to one of the following formulas:
- x_<variable>_gt_<value> (For greater than)
- x_<variable>_lt_<value> (For lesser than)
- x_<variable>_gte_<value> (For greater than or equal to)
- x_<variable>_lte_<value> (For lesser than or equal to)
Let's say at the end of the quiz, you want a caption to show a different message depending on how many questions the learner got right. The caption has two states which display the following messages:
- Sorry! You didn't pass.
- Congratulations! You passed!
The passing score is 5 correct answers. We can read the number of correct answers with the Captivate System Variable: cpQuizInfoTotalCorrectAnswers
The 'sorry' message should appear when cpQuizInfoTotalCorrectAnswers is lesser than 5. We specify that rule with the following state name: x_cpQuizInfoTotalCorrectAnswers_lt_5
The 'congratulations' message should appear when cpQuizInfoTotalCorrectAnswers is 5 or greater. For that we need the greater than or equal to formula: x_cpQuizInfoTotalCorrectAnswers_gte_5
# When multiple conditions are satisfied
You can mix and match the above formulas to create states that appear when multiple conditions are satisfied.
# Multiple variable conditions
Let's say you had a scenario about conflict resolution. You needed the learner to help Party-A and Party-B come to a compromise. If Party-A is satisfied the partyASatisfied variable will be set to true. When Party-B is satisfied the partyBSatisfied variable will be set to true.
To make a state appear when both parties are satsified you'd name it: x_partyASatisfied_true_partyBSatisfied_true
True shorthand
Due to the above mentioned true shorthand. You could also write the following state name:
- x_partyASatisfied_partyBSatisfied
To display a state when Party-A was satsifeid but Party-B wasn't, you'd give it the name: x_partyASatisfied_true_partyBSatisfied_false
# Variable conditions AND mouse conditions
Let's say you were making a toggle shape button. When you click the button it will toggle the activated variable. The toggle action will alternate the variable between the values 1 and 0.
You can give the shape button the following states:
- Normal
- x_rollover
- x_down
- x_activated
- x_activated_rollover
- x_activated_down
When the activated variable is set to 0...
- The Normal state will appear when the mouse is not over the shape.
- The x_rollover state will appear when the mouse is over the shape.
- The x_down state will appear when the leaner presses down on the shape.
When the activated variable is set to 1...
- The x_activated state will appear instead of the Normal state.
- The x_activated_rollover state will appear instead of the x_rollover state.
- The x_activated_down state will appear instead of the x_down state.