# Animate Config
Once you have bought CpMate you can install it in three steps.
# Step #1
Place the Infosemantics_CpMate.js folder you know you won't move or delete.
When working with a team
If you have multiple developers working on one course, all will be editing and publishing the Adobe Animate file.
You will therefore need the Infosemantics_CpMate.js file installed in the same folder on all machines.
Therefore, we highly recommend creating a folder at the top of one of your drives (ideally the C Drive) and storing CpMate there. Something like: C:_PROJECTS_RESOURCES\Infosemantics_CpMate.js
Otherwise, if each developer places the Infosemantics_CpMate.js file in a different location, they must repeat the following step #2 each time they receive the Adobe Animate project.
# Step #2
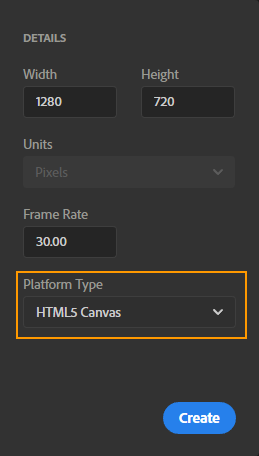
- Create a new HTML5 Canvas Adobe Animate project.

- Go to the Actions Panel.
- In the left pane, click the down arrow next to 'Global', and select Include.
- In the right pane, click the plus button. A drop down menu will appear. From there pick Add a File.
- A dialog with appear. Click the folder icon to open up a file browser.
- Browse to the folder you placed the Infosemantics_CpMate.js file in step #1. Select this file.
- Click OK to the Include an external library dialog.
# Step #3
Animate has a feature called hosted libraries. This feature is enabled by default and it downloads essential Javascript files from the internet every time the Animate OAM is run. This can cause a variety of problems, so to prevent future technical support please do the following:
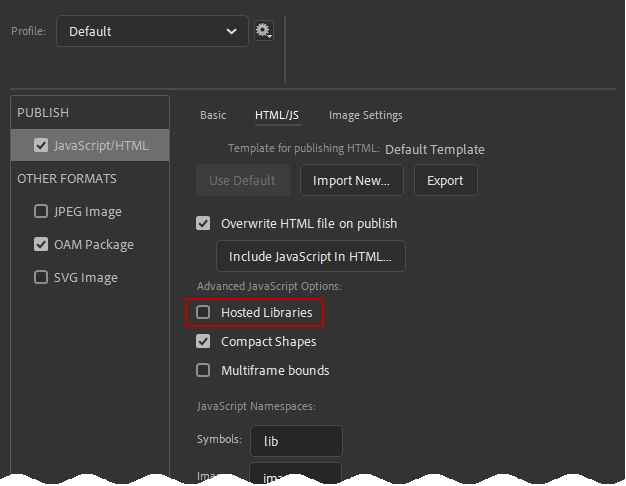
- In Adobe Animate go to File > Publish Settings...
- Select the Javascript/HTML settings.
- Move to the HTML/js tab.
- Uncheck Hosted Libraries.

# Next
Adobe Animate is now correctly configured. However, a few things must be configured in Adobe Captivate as well.